How to Configure a UPS Supporting Synology Sharing on Debian or fnosNAS
In modern home or small office network environments, an Uninterruptible Power Supply (UPS) is an essential tool for protecting devices from power interruptions. If you have a Synology NAS connected to a UPS via USB, you may want other devices (such as servers running Debian or fnosNAS) to utilize the UPS status shared by the Synology for safe shutdowns or monitoring. This article provides a detailed guide on how to configure a UPS supporting Synology sharing on Debian or fnosNAS, covering the required tools, installation steps, and configuration methods. Whether you are a Linux novice or an experienced user, this tutorial will be helpful!
What is Synology Shared UPS?
Synology NAS supports connecting a UPS via USB and can be set up as a “Network UPS Server.” This means that the Synology can share the UPS status (such as battery level and power outages) with other devices over the network. Client devices can monitor these statuses and perform actions like shutdowns when necessary. This approach is particularly suitable for scenarios where multiple devices share the same UPS, such as home servers, network switches, or other Linux devices.
This article will use Debian as an example for the configuration instructions; however, fnosNAS users can refer to similar steps, with adjustments made for specific system paths or commands.
Prerequisites
Before starting the configuration, please ensure the following conditions are met:
-
Synology NAS connected to UPS and Network UPS Server enabled:
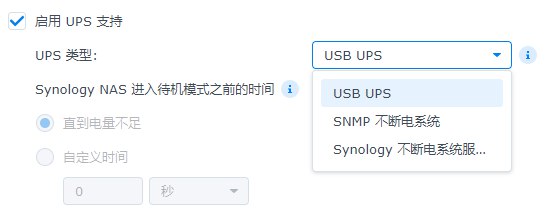
- In Synology DSM, go to “Control Panel > Hardware & Power > UPS.”
- Check “Enable UPS Support” and “Enable Network UPS Server.”
- Click “Allowed Synology Devices” and enter the IP address of the client device (e.g., your Debian server).
-
Network Environment:
- Ensure that the Synology NAS and client devices are on the same local area network.
- It is also advisable to connect the network switch or router to the UPS to maintain network communication in the case of a power outage.
-
Client System:
- This article uses Debian 12 as an example; fnosNAS users can follow similar steps.
- Ensure you have root or sudo privileges.
-
Tool Requirements:
- The installation of NUT (Network UPS Tools) is required, which is a commonly used UPS management tool for both Synology and Linux systems.
Step 1: Install NUT on Debian
NUT is an open-source tool that facilitates communication with Synology’s UPS server. Here are the steps to install NUT on Debian:
-
Update the package index:
1sudo apt update -
Install NUT:
1sudo apt install nut -
Verify the installation: Check if NUT is correctly installed:
1nut-upsmon -vIf version information displays, the installation was successful.
For fnosNAS (TrueNAS), you may need to install NUT via the command line or plugins. For TrueNAS Core, you can install it using pkg install nut; if you are using TrueNAS SCALE (based on Debian), the steps are the same as above.
Step 2: Configure NUT to Connect to the Synology UPS Server
After installation, you need to configure NUT to act as a client connecting to the Synology’s network UPS server.
-
Edit the NUT configuration file: The NUT configuration files are typically located in the
/etc/nut/directory. First, editnut.conf:1sudo nano /etc/nut/nut.confEnsure the following content exists:
1MODE=netclient -
Configure UPS monitoring: Edit the
upsmon.conffile:1sudo nano /etc/nut/upsmon.confAdd the following content, replacing
SYNOLOGY_IPwith the actual IP address of your Synology NAS:1MONITOR ups@SYNOLOGY_IP 1 monuser secret slaveups: The default name for the UPS in Synology.monuserandsecret: The default username and password for Synology (found in/usr/syno/etc/ups/upsd.users, or leave as default).slave: Indicates that this device is a client of the UPS.
-
Save and exit: Press
Ctrl+Oto save, thenCtrl+Xto exit.
Step 3: Start and Test the NUT Service
Once the configuration is complete, start the NUT service and test the connection:
-
Start the NUT client service:
1
2
sudo systemctl start nut-monitor sudo systemctl enable nut-monitorThe
enablecommand ensures that the service starts automatically upon system reboot. -
Check the status: Verify if NUT is running:
1sudo systemctl status nut-monitorIf the status displays as
active (running), then the service is started successfully. -
Test UPS connection: Use the following command to check communication with the Synology UPS server:
1upsc ups@SYNOLOGY_IPIf successful, you will see the UPS status information, such as battery level and power status.
Step 4: Set Up Shutdown Policy for Power Outages (Optional)
To ensure the Debian system can safely shut down during a power outage, you can configure a shutdown policy using NUT.
-
Edit
upsmon.conf: Open the configuration file again:1sudo nano /etc/nut/upsmon.confAdd or adjust the following options:
1
2
3
4
5
SHUTDOWNCMD "/sbin/shutdown -h now" NOTIFYCMD /usr/sbin/upssched NOTIFYFLAG ONLINE SYSLOG+WALL NOTIFYFLAG ONBATT SYSLOG+WALL+EXEC NOTIFYFLAG LOWBATT SYSLOG+WALL+EXECSHUTDOWNCMD: Defines the shutdown command.NOTIFYFLAG: Sets the notification method for power outages or low battery.
-
Restart the NUT service:
1sudo systemctl restart nut-monitor -
Simulate a test: Disconnect the UPS power and observe whether the Debian system can automatically shut down when the battery level is low.
Notes and Common Issues
-
Compatibility with Synology DSM Versions: This tutorial is tested on DSM 7.x; earlier versions (like DSM 6.x) may require configuration adjustments.
-
Network Latency: If the network switch is not connected to the UPS, communication may break during a power outage, preventing the client from receiving status updates.
-
fnosNAS Differences: TrueNAS Core uses a FreeBSD kernel, and configuration file paths may differ (e.g.,
/usr/local/etc/nut/), but the configuration logic remains the same. -
Security: The default
monuser/secretpassword is relatively weak; it is recommended to change it to a custom password on both Synology and the client, ensuring consistency on both ends.
Conclusion
By following these steps, you can successfully configure a UPS supporting Synology sharing on Debian or fnosNAS. Not only does this protect your devices from power interruptions, but it also enables multi-device collaboration in managing UPS status. This solution is simple and efficient for both home users and small businesses.
If you encounter any issues during the configuration process, feel free to leave a comment below! Also, remember to subscribe to my blog for more practical tutorials related to technology and programming.
Keywords: Synology UPS Sharing, Debian UPS Configuration, fnosNAS UPS, Network UPS Server, NUT Installation Tutorial