
When migrating Nexus to a new server or Docker, it is essential to address data backup and restoration. Below is a comprehensive backup and restoration process:
Backup
Nexus repositories store data in blob storage, with some metadata and configuration information housed in a database. It is crucial to back up both the blob storage and the metadata database together to ensure data integrity.
Follow these steps for backup:
-
Blob Storage Backup
- You must separately back up the file system or object storage containing the blobs.
- For file-based blob storage, back up the directory that contains the blobs. In a typical configuration, this would be
$data-dir/blobs. - The location of the data directory can be found in Nexus’s
bin/nexus.vmoptions. - Navigate to the data directory and execute the command
tar -czvf blobs.tar.gz blobs. - For S3 blob storage, you can use bucket versioning as an alternative backup method. Alternatively, you can mirror the bucket to another S3 bucket.
-
Node ID Backup
- Each Nexus repository instance is associated with a unique ID. You must back up this ID to ensure that when restoring or migrating Nexus from one server to another, the blob storage metrics (size and number of blobs on disk) and Nexus firewall reports function correctly.
- The file containing the node ID is located here (see directory as well):
$data-dir/keystores/node/ - Navigate to the keystores directory and package the node ID using
cd keystores && tar -czvf node.tar.gz node. - To use this backup, place these files back in the same location before starting the Nexus repository.
-
Database Backup
- Backing up the database requires creating a task from the Nexus backend.
- Follow this path: Nexus Repository Manager → System → Tasks → Create task → “Admin – Export databases for backup”.
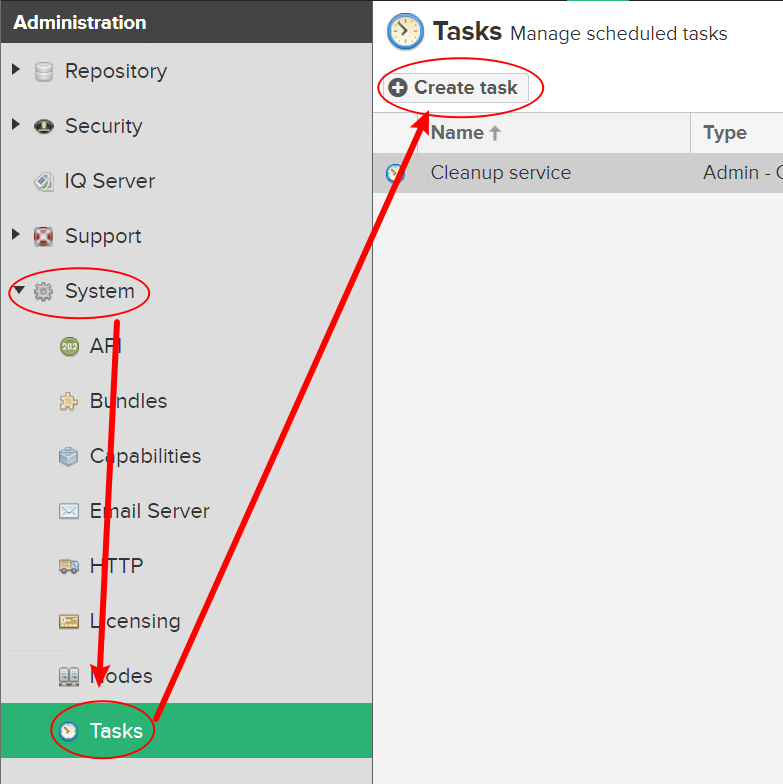
- Click the
Create taskbutton to access the following interface:
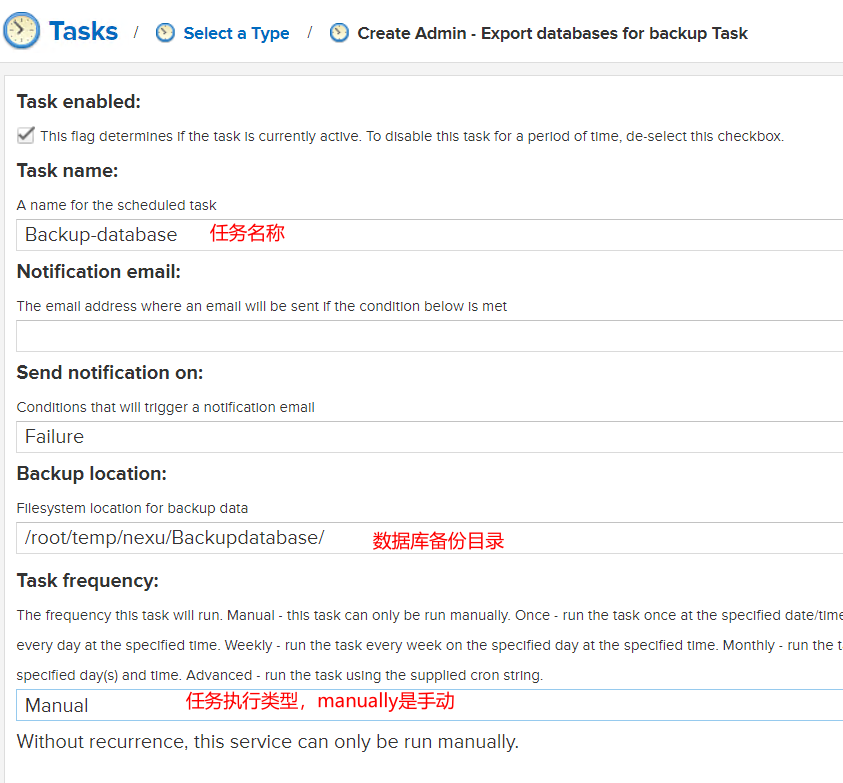
- Fill in the highlighted fields as shown in the image above.
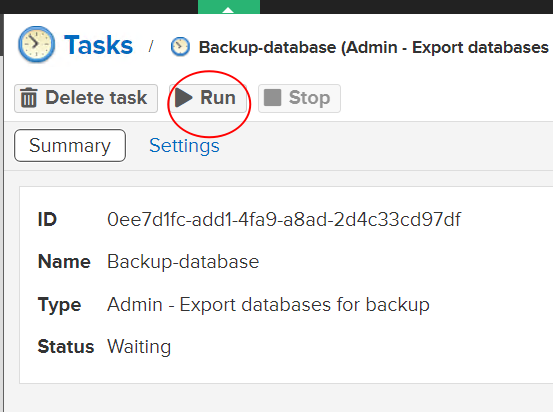
- After completing, click on the newly created task and then click the run button to execute the backup.
- While the task is running, it will export the backup data to the path specified in the Backup location field. The .bak files will include the following databases:
- Component: All relevant data that makes up components in the repository manager.
- Configuration: General management configurations such as scheduled tasks and email server settings.
- Security: All user and access management content.
- All backup files will display in a timestamp format based on the task’s start time.
During the backup task execution, the repository will temporarily enter a read-only state. Do not perform any operations during this time; just wait.
Nexus Restoration
Once the backup is complete on the old server, copy the backup blobs, node ID, and database to the new server for restoration.
This demonstration will take place in a Docker environment for Nexus. Installation guide for Nexus on Docker.
With the nexus-data directory mapped, you can directly place the data in the host machine’s mapped directory.
-
Restore Blob Storage
- Navigate to the docker-mapped
nexus-datadirectory, then enter the blobs directory and delete the original default. - Execute the extraction command:
tar -zxvf blobs.tar.gz.
- Navigate to the docker-mapped
-
Restore Node ID
- Access the
keystoresdirectory and restore the node directory using:cd keystores && tar -zxvf node.tar.gz.
- Access the
-
Restore Database
- Stop the Nexus repository.
- Delete the component, config, and security directories in
$data-dir/db. - Copy the corresponding database backup .bak files to
$data-dir/restore-from-backupfor restoration (note: for versions 3.10.0 or earlier, the restore directory is$data-dir/backup). - Restore the blob store backup corresponding to the DB backup and Node ID files.
- Restart the Nexus repository and verify that the Nexus repository is functioning properly.
- Remove the .bak files from the restore-from-backup directory.
-
Perform Data Repair
- After restoration, you may not see searchable content on the interface; data repair is necessary.
4.1 Repair Component Metadata in the Database via Blob Store
Navigate to: Nexus Repository Manager → System → Tasks → Create task → “Repair – Reconcile component database from blob store”.

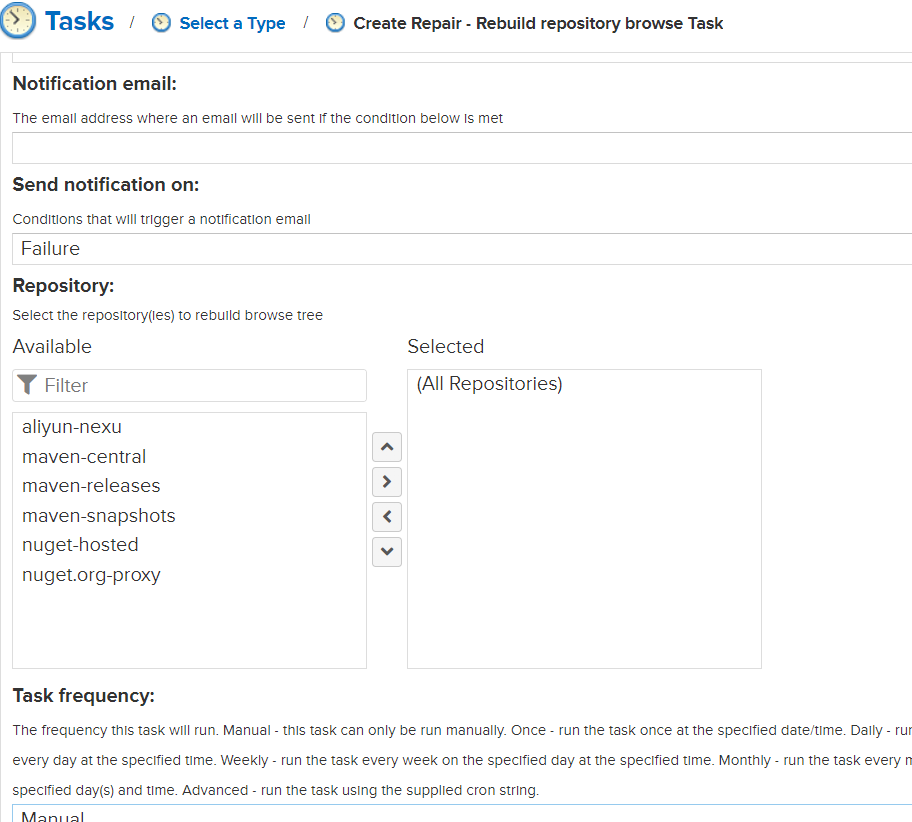
4.2 Rebuild Browse
Navigate to: Nexus Repository Manager → System → Tasks → Create task → “Repair – Rebuild repository browse”.
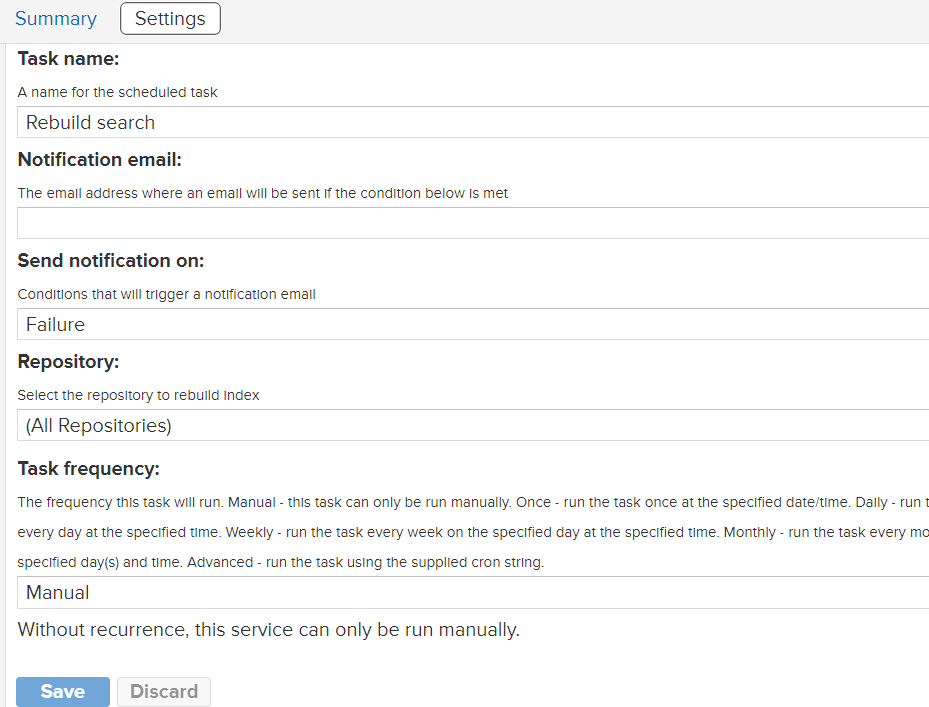
4.3 Rebuild Search
Navigate to: Nexus Repository Manager → System → Tasks → Create task → “Repair – Rebuild repository search”.
With this, the migration is complete.